Top Tips How to Achieve a Proper Seal With a Respirator?

Time:2026-10-09 Author:Oliver
0%

A respirator protects only when its face seal works. Learning how to achieve a proper seal with a respirator begins with fit, not comfort alone. OSHA’s Respiratory Protection Standard, 29 CFR 1910.134, requires employers to provide fit testing before initial use, whenever the respirator model changes, and at least annually. This requirement reflects a practical truth: one mask cannot fit every face.

Small gaps matter. Air follows the easiest path around the nose, cheeks, or chin. NIOSH guidance warns that facial hair, eyewear, skin folds, and damaged straps can interfere with sealing surfaces. A worker may feel protected while contaminated air enters unnoticed. That possibility deserves attention.

Fit testing is essential. Qualitative testing uses an approved test agent, while quantitative testing measures leakage more precisely. The selected respirator must match the hazard, workplace conditions, and user’s facial features. A pre-use seal check should follow every time. Cover the filters, inhale gently, and confirm that the facepiece pulls slightly inward. For an elastomeric model, exhale carefully and check for escaping air. Do not confuse this check with formal fit testing.

Details decide outcomes. Tightening every strap may create pressure without improving protection. A clean seal often performs better than an uncomfortable one. Still, personal experience has limits. Sweat, movement, facial hair growth, or a different cartridge can change the result. Review the manufacturer’s instructions and consult a trained respiratory protection professional when uncertainty remains. The most reliable seal is verified, observed, and sometimes questioned.
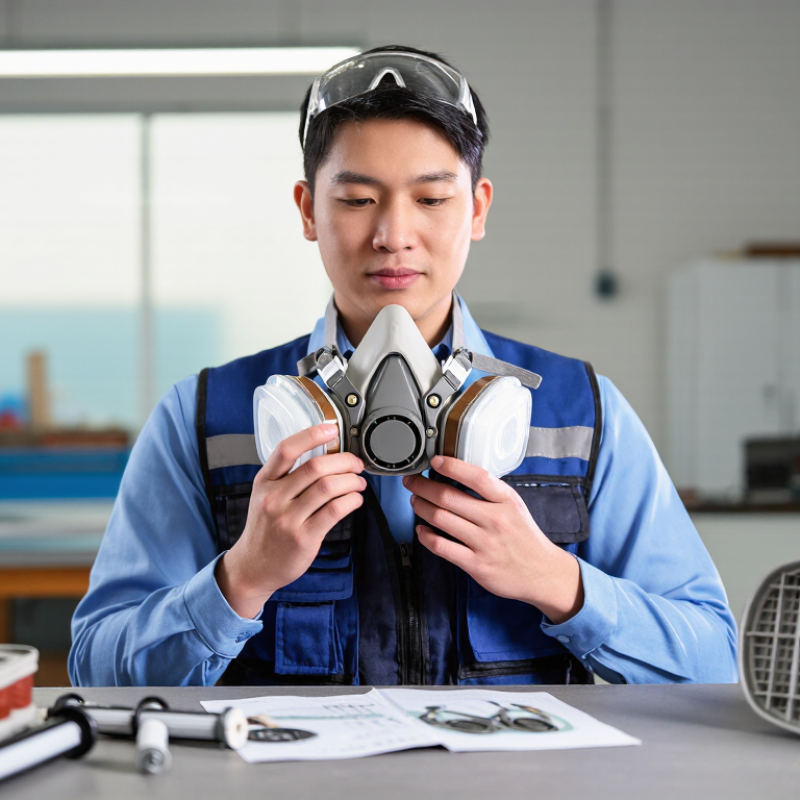
Top Tips How to Achieve a Proper Seal With a Respirator?

Understanding Respirator Seal Requirements

A respirator works only when its face seal is reliable. Fit depends on the wearer, facepiece, size, and wearing conditions. OSHA’s respiratory protection standard, 29 CFR 1910.134, requires fit testing before initial use, when the model or size changes, and at least every 12 months. NIOSH guidance also emphasizes that facial hair, glasses, and other equipment can interfere with the sealing surface. A respirator may feel tight, yet still leak around the nose or cheeks.

Tips: Choose the correct size through a formal qualitative or quantitative fit test. Keep the sealing area clean-shaven. Position the straps evenly, then perform a user seal check every time you put it on. For a negative-pressure check, gently cover the filters and inhale. The facepiece should pull inward without air entering. For a positive-pressure check, cover the exhalation valve and exhale gently. Adjust and test again if leakage appears.

Do not treat a seal check as a replacement for fit testing. It is only a quick confirmation. OSHA also requires fit testing when facial structure changes, significant weight changes occur, or a different facepiece is selected. A practical detail matters: glasses, hood edges, and helmet straps can shift during work. Even experienced users may rush this step. That is the uncomfortable part. Recheck the seal after bending, talking, or entering a warmer area. Small leaks can become serious exposure pathways.

Selecting the Right Respirator for Your Face

Selecting the right respirator starts with your face, not the product label. Measure your face length and width, then compare them with the manufacturer’s size guidance. A respirator should sit firmly across the nose, cheeks, and chin. It should not press painfully or leave visible gaps. OSHA’s Respiratory Protection Standard, 29 CFR 1910.134, requires fit testing before initial use and at least annually. This requirement matters because comfort alone cannot prove protection.

The face seal also depends on facial hair, glasses, scars, and movement. CDC and NIOSH guidance warns that hair crossing the sealing area can interfere with a reliable seal. Assigned Protection Factors offer useful context: OSHA lists an APF of 10 for many half-mask respirators and 50 for full-facepiece models. These figures assume correct selection, fit, and use. A higher number does not fix a poor seal. In practice, users often choose a familiar size too quickly. That is a weakness worth questioning.

Tips: Try the respirator while speaking, turning your head, and bending forward. Perform both positive and negative pressure user seal checks each time. If air leaks around your nose, chin, or cheeks, stop and adjust the straps. If leakage continues, choose another size or design. Facial hair in the sealing zone may require removal or a different respirator type. Do not rely on a quick mirror check. A trained fit tester can identify gaps you may never feel.

Preparing the Face, Straps, and Respirator

Top Tips: How to Achieve a Proper Seal With a Respirator?
Preparing the Face, Straps, and Respirator

A tight-fitting respirator protects only when air passes through its filter, not around its edges. Start with a clean, dry face. Oil, sweat, makeup, and moisturizer can weaken contact with the sealing surface. Facial hair is a common problem. Even short stubble may create tiny air channels beneath the seal. Follow workplace fit-testing requirements, especially when wearing the respirator for hazardous tasks.

Inspect the respirator before every use. Look for cracked parts, stretched straps, damaged valves, or a distorted facepiece. Wash reusable components according to the manufacturer’s instructions, and allow them to dry fully. Do not pull the straps roughly. Place the respirator evenly over your nose and mouth, then adjust the straps gradually. The seal should feel firm, not painfully tight. Over-tightening can distort the facepiece and reduce comfort.

Perform a user seal check each time. Cover the filter surfaces or inhale and exhale as the instructions require. You should feel slight pressure changes without air leaking around your cheeks, nose, or chin. Stop and readjust if you detect leakage. I once focused too much on strap tension and missed a folded edge near my nose. That small mistake changed the fit. Glasses, hoods, and other protective equipment can also interfere with sealing. Check the complete arrangement before entering the work area.

Performing a User Seal Check Correctly

Top Tips: How to Achieve a Proper Seal With a Respirator?

Performing a user seal check correctly helps confirm that a tight-fitting respirator is positioned properly. Check the seal every time you put it on. Clean, dry skin is important. Facial hair, glasses, and loose straps can create tiny leakage paths. Adjust the straps evenly, without pulling too hard. The respirator should feel secure, but not painful.

Tips: For a positive-pressure check, cover the respirator surface and exhale gently. You should feel slight outward pressure, with no air escaping around the edges. For a negative-pressure check, cover the filters or openings and inhale gently. The facepiece should draw inward slightly. If air enters, reposition it and repeat the check. Do not rely on a strong breath. Excessive pressure can give a false result.

A seal check is not a substitute for professional fit testing. It only confirms the fit at that moment. In practice, people often rush this step when work is busy. That is an easy mistake to make. Pause near a mirror and inspect the nose, cheeks, and chin areas. If the seal still fails, leave the contaminated area and choose another properly fitted respirator. Stop and reassess.

Respirator Seal Checks and Fit-Test Thresholds

A user seal check must be performed every time the respirator is donned. It confirms that the facepiece is positioned correctly, but it does not replace a required fit test.

Positive-pressure check: Cover the exhalation valve or surface of the respirator and gently exhale. The facepiece should bulge slightly without air leaking around the seal.
Negative-pressure check: Cover the filter inlets and gently inhale. The facepiece should collapse slightly and remain collapsed briefly without inward leakage.
If leakage is detected: Remove and reposition the respirator, adjust the straps, and repeat the check. Do not enter a contaminated area until the seal is achieved.

Chart values show OSHA quantitative fit-test pass levels: 100 for half-mask respirators and 500 for full-facepiece respirators. User seal checks are qualitative and do not produce a numerical fit factor.

Maintaining a Reliable Seal During Wear

A reliable respirator seal depends on more than tightening the straps. It begins with the correct size and a clean, dry face. Facial hair, stubble, cosmetics, and deep wrinkles can create tiny gaps along the sealing surface. Even a comfortable respirator may leak.

I used to rush the seal check when the work area felt familiar. That was a mistake. Each time you put on the respirator, cover the filters or inlets as instructed and breathe in gently. The facepiece should pull slightly toward your face without air entering around the edges. For a pressure check, breathe out gently and look for leaks near the nose, cheeks, and chin. Stop and adjust it.

Keep the straps flat and evenly tensioned. Twisted straps can pull the facepiece sideways. Glasses, hoods, helmets, and loose hair may also disturb the seal during movement. Turn your head, speak, and bend carefully after fitting. If the seal shifts, leave the exposure area when possible and refit in a safe location.

A seal check cannot replace a formal fit test, which should be completed with qualified guidance and repeated when the model, size, facial features, or workplace conditions change. Inspect the respirator before use. Do not rely on it if the facepiece is cracked, hardened, or damaged. I still find missed steps during routine checks, especially when schedules become tight. Slowing down is part of competent protection.

FAQS

How should I choose the correct respirator size?

Measure your face length and width. Compare those measurements with the size guidance. It should sit across your nose, cheeks, and chin. No visible gaps.

What should a proper respirator seal feel like?

The respirator should feel firm, not painful. It should stay in place while speaking, turning, or bending. Comfort alone proves little. Check carefully.

Why can facial hair cause problems?

Hair crossing the sealing area can create tiny air channels. Even short stubble may weaken protection. Remove hair from the seal area, or choose another respirator design.

How often should I perform a user seal check?

Perform a seal check every time you put on the respirator. Cover the filters or openings as the instructions require. Inhale or exhale gently. Do not forcefully breathe.

What should happen during a positive-pressure seal check?

Cover the respirator surface and exhale gently. You should feel slight outward pressure. Air should not escape around your nose, cheeks, or chin. If it leaks, readjust it.

What should happen during a negative-pressure seal check?

Cover the filter surfaces or openings and inhale gently. The facepiece should draw inward slightly. If air enters, reposition the respirator and repeat the check.

Is a user seal check the same as a professional fit test?

No. A seal check confirms the fit at that moment only. A trained fit tester can find gaps you may never feel. Workplace requirements may require testing before use and regularly afterward.

What should I inspect before wearing a reusable respirator?

Look for cracked parts, stretched straps, damaged valves, or a distorted facepiece. Wash reusable parts as instructed, then dry them fully. Do not pull straps roughly. Small damage matters.

Can glasses, hoods, or skin products affect the seal?

Yes. Glasses, hoods, oil, sweat, makeup, and moisturizer can interfere with contact. Check the complete arrangement before entering the work area. I once tightened straps too much and missed a folded edge near my nose. That mistake still matters.

Conclusion

Achieving a secure respirator seal is essential for effective protection against airborne particles and contaminants. This guide explains how to achieve a proper seal with a respirator by choosing a model and size that match your face shape, checking that the sealing surface is clean and free from hair or anything that could create gaps, and inspecting the respirator and straps before use. Proper positioning is also important: the respirator should sit comfortably over the nose, mouth, and chin without being twisted or loose.

Before entering a contaminated environment, perform a user seal check according to the respirator’s design. Adjust the straps gradually rather than overtightening them, and confirm that air does not leak around the edges when breathing in and out. During wear, avoid touching or shifting the respirator unnecessarily, monitor for changes in fit, and replace it if it becomes damaged, wet, dirty, or difficult to breathe through. Regular practice and consistent checks help maintain reliable protection.

Oliver

Oliver

Oliver is a seasoned marketing professional with a wealth of expertise in driving brand awareness and engagement. With a deep understanding of our company's product offerings, he consistently delivers high-quality content that enriches our professional blog. His insights not only shed light on......